"If a girl says not to get her a birthday present that means get me a birthday present and make sure it's jewelry." — Kami Garcia author of Beautiful Creatures
Mid-year in Metro Manila means a bit of sunshine in the morning and thunderstorms in the afternoon. You initially plan for a dinner out with friends, but the prospect of getting trapped in the streets-turned-waterworld is just not worth it. Make the most of condo living. Invite your friends over for afternoon coffee at the Sky Lounge, overlooking the bustling cities of the capital region. Organize a board game tournament in the Entertainment Room or a weekend of arts and crafts in your charming condo home.
In just a few months, the yuletide season is upon us again. Take advantage of the downtime by completing your Christmas gift list. Explore DIY jewelry. You'll be surprised at how many accessories you can make with little budget. You may as well include presents for other occasions such as Valentines, and birthdays. Here's your guide on how to make DIY jewelry.
#1: Wire-dropped wire earrings

Photo courtesy of ialwayspickthethimble.com via Pinterest
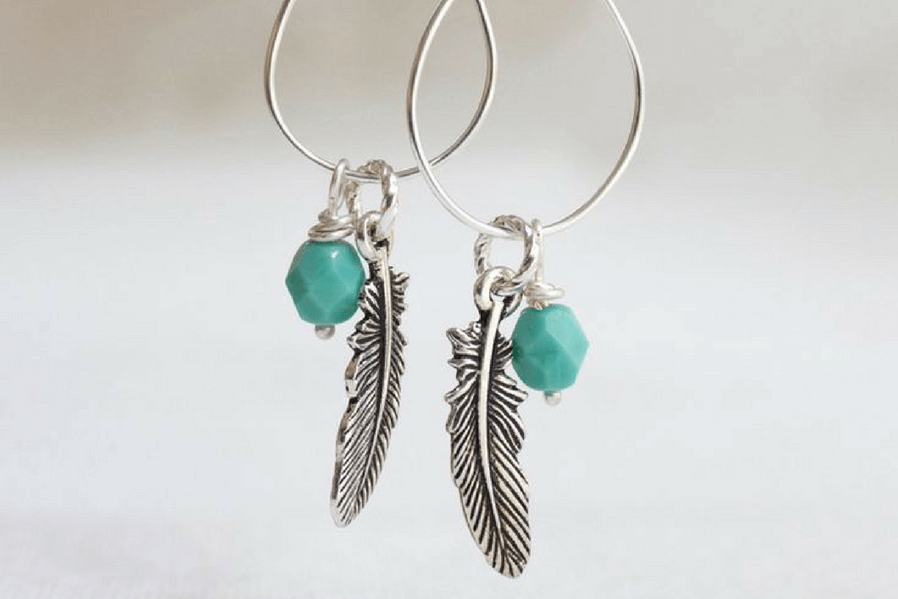
Using flat-nose pliers, make a rounded shape with the wire (4-inch piece of 20-gauge wire) with one end longer than the other. Bend the shorter wire with needle-nose pliers toward the back and wire it up all the way around. You should have a complete loop around the longer wire. Bend the longer wire parallel to the loop to form a smaller loop. Continue bending the wire up and around the earring using flat-nose pliers. Trim excess wire with side cutters. You can now slide the bottom loop of an earwire onto the small loop of the earring, and charms and accent beads onto the larger loop.
#2: Braided bead necklace

Photo courtesy of Kollabora via Pinterest
DIY crafts are effective stress busters. They take your worries away and keep your focus on the task at hand. To make a gorgeous braided bead necklace, thread 5.5-inch of beads onto each of six pieces of 10-inch heavy threads. Thread two strands of threads through one bead tip and tie a double knot. Slide the bead tip up to the knot, then clamp little clam shells over it. Repeat on the opposite end. Do this to each pair to create three pairs of necklaces. Clamp three of the ends to a large jump ring that connects to a 10-inch chain. Connect the remaining end of the chain to a clasp. Do the same stop to the other half of the chain. You can use as many threads of beads as you want, and explore various types of braids.
#3: Leather embellished collar
Photo courtesy of lovesoyl.stfi.re via Pinterest
Thanks to Pinterest and Youtube, there is a how-to tutorial virtually on any craft you can think of. Upcycle old leather into an edgy accessory. First, create a pattern for the collar by drawing a cross with 13 cm (horizontal) and 21 cm (vertical). Mark point A to B at 1.5 cm on the top part of the vertical line and point C to D at 5.5 cm at the bottom. Draw an outer circle by connecting points A and D and an inner circle with points B and C. You should have an oval-shaped choker pattern. Cut the leather using this pattern. Adorn the leather choker with pearls, laces or studs. Bore two holes at the end of the collar and close with a string or a ribbon.
#4: Funky fringe necklace
Photo courtesy of Lilyshop via Pinterest
You can buy yards of fringe from fabric stores in the mall or in Divisoria. Lay out the fringe on the table and use a ruler to mark how long you want your fringe to be. Release the fringe pieces by cutting the bottom thread off. Lay out a chain link and measure from end to center to determine where you will place your fringe. Attach the chain by gluing it along the center of the backside of the fringe. Completely dry overnight. You can use jump hooks to close the necklace.
#5: Fabulous washer necklace
Photo courtesy of By Wilma via Pinterest
Want to know a stylish condo craft you can sport in the office? Know how to make a fab DIY washer necklace. Paint ten washers with 11 mm holes with your choice of nail polish color. You can also wrap the washers with colorful threads or glue crystals and beads. Attach the washers with 10 mm jump rings to form a triangular shape. Feel free to arrange the washers in various ways. Then, attach the washers to a chain. You can reuse an old necklace.
#6: Trendy woven cuff
Photo courtesy of Brit Morin via Pinterest
To create your own woven cuff, you will need paracord ropes. You can use two contrasting colors. Cut six pieces of rope that fit around your wrist. Secure both sides of the cuff with cord ends and add a clasp. Tie embroidery floss on one piece of rope and weave across the other pieces.
#7: Gold rock-and-wire ring
Photo courtesy of Kollabora via Pinterest
It's never too early to prepare a customized gift for Mother's Day. Surprise your mom with a gold rock and wire ring. You simply need a small rock, gold spray paint (or silver, if you prefer), 5-inch wire, glue stick and a ring. Spray paint both sides of the rock in a well-ventilated work area. Attach the rock to the ring using a glue stick and glue gun, then let it dry for at least an hour. For an edgy look, wrap a piece of gold wire around the rock and the ring. Secure the end of the wire into the ring base so no wire is poking out.
#8: Chic studded cuffs
Photo courtesy of marthastewart.com via Pinterest
Cut heavyweight cotton webbing or twill tape (about about 1 and 1/4 inches thick) to fit wrist plus an extra 2 inches for hemming. Hem both ends by folding over ½ inch, then over another ½ inch. Secure the ends by stitching with matching thread. Place half of the snap on top of one end of the webbing with the other half on the bottom of the opposite end of the webbing. Stitch snaps to each end of the cuff. Embellish the cuffs with studs, securing each stud by folding spikes closed around the webbing.
#9: Glam tassel earrings
Photo courtesy of Trinkets in Bloom via Pinterest
Tassel earrings are must-haves for your weekend parties. You can buy a pair of upholstery tassels and 5-inch rhinestone trim from a fabric or accessory shop. Cut two pieces of rhinestone trim and glue them around the top of the tassels. Sew the ends of the trim together. Run a thread through the trim and the top of your tassel a few times to secure. Add jump rings and earring hooks to the top of each tassel. Color the bottom of the tassel with a sharpie in a well-ventilated area. You can also dye the tassel with a shade of your choice.
#10: Dyed wooden beads necklace
Photo courtesy of marthastewart.com via Pinterest
Buy wooden beads in bulk from a crafts shop. Choose beads in various sizes from ½ to 1 inch in diameter. String enough beads to fill a 2 mm round leather cord. Transfer the beads onto floral wire then submerge them into a mix of 8 cups of boiling water with powder dye. Try dye in teal, denim blue and yellow. Let the beads dry overnight. You can spray polyurethane to seal the color. Restring the dyed beads on the leather cord.
#11: Dip-dyed knotted rope necklace
Photo courtesy of tanyaaguinigastudio.bigcartel.com via Pinterest
To create a fashionable rope necklace, you need a rope, liquid dye in two colors, lobster claw, link chain jump rings and end caps. Make a knot using a single strand of a 27-inch rope folded in half. Prepare a bowl of the first dye and dip the knot into it for five minutes. Invert the rope and dip the other end of the rope into a bowl of the second dye. Let the rope dry overnight. Insert end caps to the rope endings and make a link of three with jump rings on each side. Attach the rings to the end caps to join them together. Secure the necklace with a link chain on one side and a lobster claw on the other.
There's so much to do in your condo home on rainy weekends. Don't just curl up in your bed and sleep the beautiful day away. Get productive. Do arts and crafts. You can research on more projects and steps for making your own jewelry. Ring your friends and get busy together.
